Check out the tutorial, and thanks for using GeneMANIA!
THE OFFICIAL BLOG
Monday, August 29, 2011
OpenHelix tutorial
GeneMANIA has a video tutorial at OpenHelix. It gives an overview of GeneMANIA's features, and it shows you how to use them.
Friday, August 12, 2011
Downloading GeneMANIA Data
The complete set of interaction networks used in the GeneMANIA system are now available for download at http://genemania.org/data/. The data is in plain text format and is described in detail on our data archive help page.
Included along with the interaction networks are additional files providing network source references as well as the gene identifiers used in the data processing. The individual files are simply tab-delimited text with a header row.
Current as well as previous data releases are available. You can identify datasets by their production date, this corresponds to the 'Last database update' field displayed at the top of the printable report that can be generated after running a query on the GeneMANIA website. The data download location organizes datasets into folders by this production date in year-month-day format, such as '2011-08-03'.
The data files are collected and compressed into a single large archive file per organism. As a guide to size, the files for the latest GeneMANIA data release total the following:
| Organism | # Networks | Archive size |
| Plant | 186 | 574M |
| Worm | 107 | 98M |
| Fly | 156 | 193M |
| Human | 353 | 533M |
| Mouse | 225 | 468M |
| Rat | 140 | 163M |
| Yeast | 213 | 109M |
One additional and perhaps useful network is packaged separately, this is the combined network used by default when GeneMANIA performs queries on small gene lists. It's generated by integrating the individual default networks using a weighting method based on Biological Process Gene Ontology (GO) annotations. The network weights used to perform the integration are also provided in an additional file.
Note: the Cytoscape plugin uses a different format for networks and you should use its internal download system to retrieve data.
As always, feedback is welcome. The GeneMANIA contact form is available online.
Friday, February 4, 2011
Even faster gene predictions
One question we sometimes get from our users is, “I have lots of gene lists. Can I do predictions with them all in one shot instead filling out the form each time?”
Query Runner is our solution to this problem. It's a scriptable command-line tool bundled with the GeneMANIA Cytoscape plugin and highly optimized to eat gene lists for breakfast.
You can choose from a bunch of different output formats for the prediction results ranging from plain gene lists with scores, to full-fledged reports packed with provenance, network adjacency lists and GO annotation statistics.
Loading up prediction networks is currently the biggest bottleneck in GeneMANIA. For example, we have about 650 MB worth of networks, compressed, in our human data set. Most of the time in the prediction process is spent loading that up. For instance, in our example human query, loading takes up 61% of the time of a single prediction:

The GeneMANIA website and Cytoscape plugin get around this by loading the data once and performing multiple queries with it, one at a time:

Query Runner tops this by running a query on each available core on the machine:

On a quad core processor, it takes just as long to run four predictions as it does for one:

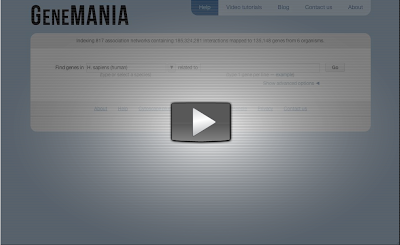
Tutorial: Getting started with GeneMANIA
Tuesday, February 1, 2011
Editing colours in the GeneMANIA visualisation
We've been asked recently whether it is possible to customise the colours used in the GeneMANIA visualisation. We understand the rationale behind this request: Sometimes, it is useful to change the colours to have a better aesthetic fit with a publication.
That being said, the colours used in GeneMANIA were not chosen arbitrarily. We chose the colours of most of the networks to be strong, and we chose much lighter, less saturated colours for co-expression and co-localisation networks.
Often, edges for co-expression and co-localisation form close to the complete graph. Since this does not add much visual information, we decided to make these edges less visually prominent and not affect the layout.
In future, we may have a feature to allow the user to change the network colours. However, this will need to take into account the impact it will have on usability and layout.
In the meanwhile, you can edit the colours of the network in the PDF report with a tool like Adobe Illustrator. The next version of GeneMANIA will support exporting the network as SVG. Since SVG is an open format, it should be easier to edit.
Tuesday, January 25, 2011
A GeneMANIA usage example.
Here's a protocol that highlights some of the newer features of GeneMANIA.
1) Choose “yeast” from the species box
2) Press "example" underneath the gene box to fill it with the default list
3) Open the advanced options panel by clicking on “Show advanced options”
4) Choose “50” genes from the “Number of gene result” box
5) Press “GO” at the upper right corner of the interface
6) Wait.
8) Hover over “M Phase” in the networks tab – see the genes annotated with M Phase change colour. Most of the genes in the network have this annotation. Click on the “plus” sign to colour the nodes
9) Find “double-strand break repair” in the list of annotations. When you hover on top of it, the nodes with the annotation will change colour. Click on the “plus” sign besides it to colour the nodes with that annotation. This recolours some of the nodes because they have multiple annotations.
10) Continue down the list until you find “anaphase-promoting complex”, click on the “plus” sign beside it to colour these nodes.
Now you can easily see that GeneMANIA recovered the two distinct functional groupings.
You can now save the result of your analysis either as a publication-ready figure or a spreadsheet with a list of all of your interactions.
12) Click on the Networks tab
13) In the networks tab, uncheck all the boxes except the one beside "Physical interactions"
14) Choose “Reset layout” in the Actions menu.The anaphase promoting complex is tightly linked together, but the DNA damage repair genes are more loosely connected.
That's all for now.
1) Choose “yeast” from the species box
2) Press "example" underneath the gene box to fill it with the default list
3) Open the advanced options panel by clicking on “Show advanced options”
4) Choose “50” genes from the “Number of gene result” box
5) Press “GO” at the upper right corner of the interface
6) Wait.
While you are waiting, GeneMANIA is assigning a percentage weight to each of the networks according to how much more connected genes in your input are to each other compared to genes in the rest of the network. Then it is making a new, list-specific composite network that’s equal to a weighted average of the selected networks. Then the GeneMANIA engine will do label propagation on the composite network to score all the other genes in the networks according to how strongly associated they are to the query genes. Once this process is done, GeneMANIA takes the top 50 most highly associated genes and displays them, along with the query genes, in a browse-able network.
Once the network returns, you'll see that there are a lot of interactions among the genes in the network but you might notice that the input genes (whose nodes are coloured in gray) fall into two groups. The network layout uses a random initialization, so it's similar but not exactly the same every time. We will now make the groupings clearer by colouring nodes according to their function.
7) Open the function tab8) Hover over “M Phase” in the networks tab – see the genes annotated with M Phase change colour. Most of the genes in the network have this annotation. Click on the “plus” sign to colour the nodes
9) Find “double-strand break repair” in the list of annotations. When you hover on top of it, the nodes with the annotation will change colour. Click on the “plus” sign besides it to colour the nodes with that annotation. This recolours some of the nodes because they have multiple annotations.
10) Continue down the list until you find “anaphase-promoting complex”, click on the “plus” sign beside it to colour these nodes.
Now you can easily see that GeneMANIA recovered the two distinct functional groupings.
You can now save the result of your analysis either as a publication-ready figure or a spreadsheet with a list of all of your interactions.
11) Click on the “Save” menu. If you choose “Save report as PDF”, you’ll get a PDF report of your analysis, if you choose “Save network as text”, you’ll get a tab-delimited text file with all of your interactions.
Note that the physical interactions alone nicely distinguish the two functional groups of nodes. To see this, you can do the following:12) Click on the Networks tab
13) In the networks tab, uncheck all the boxes except the one beside "Physical interactions"
14) Choose “Reset layout” in the Actions menu.The anaphase promoting complex is tightly linked together, but the DNA damage repair genes are more loosely connected.
That's all for now.
Subscribe to:
Posts (Atom)